Batch Scans for Individuals
Permissions
| Compliance Officer | Advanced User | Standard User | Data Entry Operator | Billing Officer | Auditor |
|---|---|---|---|---|---|
| edit | edit | edit | edit | clear | clear |
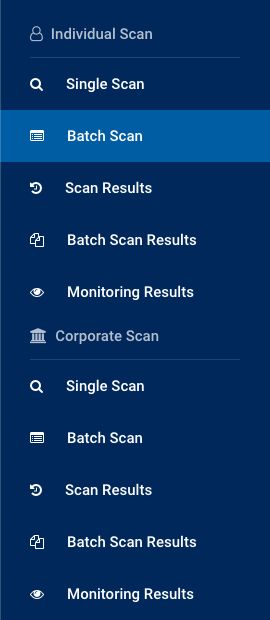
You can screen for PEP & Sanction, Law Enforcement, Regulatory Enforcement and Adverse Media checks for individuals in volume via Individual Scan > Batch Scan.
Before Running a Scan
To perform a batch scan of individuals, you will need to check or select the following, and have your CSV or XML batch file prepared:
- Organisation
- Scan settings
- Batch file in CSV or XML format (UTF-8 encoded recommended)
CSV or XML batch file templates
To help you get started, you can download CSV and XML templates and sample batch files here.
CSV vs structured spreadsheets
CSV (Comma-Separated Values) and structure spreadsheet files (e.g. XLSX from Microsoft Excel) are both used to store tabular data, but serve different purposes. CSV files are simple, plain-text files with data separated by commas, making them universally compatible across different systems and applications. In contrast, XLSX files are more complex, supporting advanced features like formatting, formulas, and multiple worksheets. When importing data into our system, using the standard CSV format ensures clean, straightforward data transfer, preventing potential import errors caused by complex spreadsheet elements.
Organisation
If you are part of a multi-level organisation structure, select the organisation which you would like to run the check for from the drop-down list for Organisation.
If you are part of a single level organisation, you do not need to do anything for this step.
Scan Settings
There are multiple settings provided to manage the scope and coverage of PEP & Sanction screening as per your organisation's risk level compliance requirements.
person Compliance Officers can predetermine and preset these settings or set them to be user defined to enable the settings to be changed during scanning. These settings are defined in the Organisation Settings.
Scan Setting Details and Description
| Option | Description |
|---|---|
| Name Match Type | Used to determine how closely a watchlist profile must match a person's name before being considered a match. The options are Exact Scan results return matches where the First and Last Name match exactly. Middle names are also taken into account but Middle Name matching does not eliminate watchlist entities with no middle name. Scan results include matches, where:
Exact (Including Middle Name)
Close
|
| DOB Tolerance (Years) | Used to enable tolerance of date of birth variations based on years. This value applies to both before and after the entered birthdate. Specifying this tolerance disregards the specific day and month to return matches within the specified year range. You will only see this option if your Compliance Officer has enabled this setting for your organisation. |
| Match Rate | If Close Name Match Type is selected, this can be used to control the results by setting a match rate threshold.A higher threshold will return results with minor variations whereas a lower threshold will return larger variations in the sound of the name. Example: The name
Example: The first name and last name
|
| Whitelist Policy | If Due Diligence has previously been carried out, profiles marked as No Match are whitelisted, and can be ignored and excluded from being returned. This can help eliminate match results previously determined to not be a true match.This option requires a The options are:
|
| (Country of) Residence Policy | Used for matching the Country in the Address of the person with the locations associated with the matching profiles. This requires the Country to be specified in the Address field when scanning for the person. The options are:
info If you want to apply the defined PEP Jurisdiction Inclusion or Exclusion list, do not check |
| Default Country of Residence | Used for nominating a Country of Residence for an individual's address where a country cannot be identified. For addresses which are not blank but do not contain an identifiable country, if a Default Country of Residence has been nominated, it will be automatically assigned to the individual as the Country of Residence. This setting is defined by the Compliance Officer in the Organisation Settings. |
| Apply to blank Addresses | Used in conjunction with Residence Policy and Default Country of Residence, this is used for eliminating match results where the individual's Country of Residence is not found in any of the Locations in the matching entity's profile. This option applies the preset Default Country of Residence to blank addresses during PEP and Sanction scans. |
| PEP Jurisdiction | This setting filters PEP and RCA profiles based on defined jurisdictions for inclusion or exclusion, and can be used for filtering domestic PEPs. To use this setting, ensure The settings available are based on the organisation settings defined by the Compliance Officer and can be either Exclude or Include:
If no jurisdictions are defined, this will behave the same way as |
| Exclude Deceased Persons | Used for eliminating match results where the person is recorded as deceased. The options are:
|
| FATF Jurisdiction Risk | Perform additional search to include technical compliance and effectiveness ratings, based on FATF recommendations, for countries linked to matched profiles. The options are:
|
| Watchlists | Scope of watchlist categories applied for the new scan. The available options are based on the Organisation settings. The Compliance Officer can edit the list in Organisation Settings as well lock the editing of the list. |
Scan Service
You have the option to perform AML risk assessments of your customers through a simple, structured process. When starting a new batch scan, you can select the service during the batch file upload screen. This will activate the Risk Assessment tab in the Batch Scan Results screen on completion of the batch processing.
This option is available if your organisation has subscribed to the AML Risk assessment service. When activated, all authorised users of the service with screening permission have access to this feature.
Accessing Risk Assessment check for batch scans
You must select the Risk Assessment scan service at the start of the batch file processing in order to use this feature. Otherwise, this tab will not be visible in the Scan Results or Batch Scan Results screens. 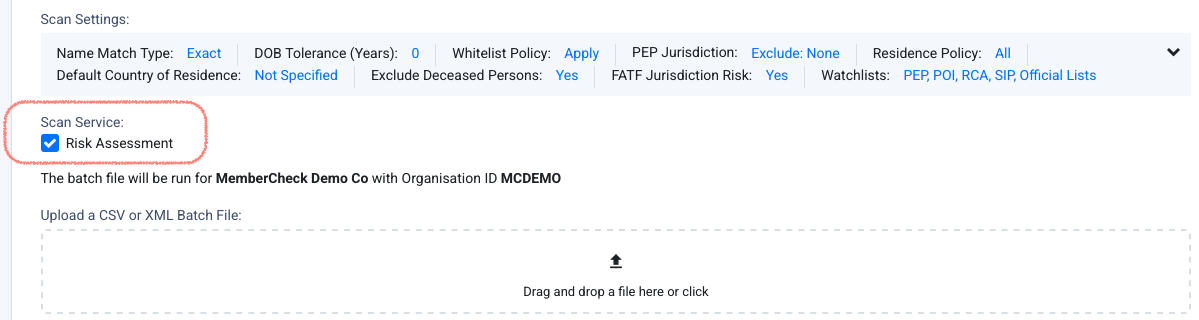
Preparing Your Batch File
Please refer to the section Batch Files for details of the batch file formatting.
Running a Batch Scan
To start screening for multiple individuals using a batch file, the following are necessary information:
- Organisation ID
- First Name and Last Name or Full Name or Original Script Name
- Client ID (check conditions below)
- Date of Birth (check conditions below)
Client ID
Formerly "Member Number". A unique reference identifier or profile name for the individual is required if you want to add the person for ongoing monitoring or perform due diligence.
You may use a Customer Reference or Client Account ID or any unique identifier for the person.
In cases where individuals do not have and never will have a Client ID, such as staff for example, arbitrary Client IDs can be used and prefixed by a letter, or letters, to distinguish them from your regular client base.
In cases where individuals may be allocated a Client ID in the future, such as new clients for example, an arbitrary number should not be allocated. The client number that will be allocated to the individual when they become a 'new client' should be used as the Client ID for scanning purposes. In this way, due diligence decisions will be allocated to the real client identifier and subsequently the whitelist will also be appropriately applied to that Client ID.
Date of Birth
The Date of Birth will be required during scanning if your Compliance Officer has enabled this feature in the Organisation Settings > Ignore Blank DOB.
The more information you are able to provide for the person will enable more targetted matches and improve the results returned.
Batch files are processed asynchronously. Once the system has completed the upload, it will process the file in the background, enabling you to navigate to other areas of the site, or start uploading another batch file.
Quick How-To Guides
Upload and scan batch file
Upload a CSV, XML or ZIP of the batch file and preview the contents of the file before running the scan. The formatting of the batch file will be validated during this process.
Duplicate entries and Client ID detection in batch files
Preprocessing of batch files include detection of duplicate entries and Client IDs within the same batch file. If the batch validation setting is turned off, duplicate entries will be ignored and excluded from processing. If the validation setting is turned on, the system will not proceed until the duplicates are removed or corrected.
Errors with batch file
Upload a batch file (CSV, XML or ZIP of CSV or XML file) and preview the contents of the file before running the scan.
If there are formatting issues with the batch file, these specific cells will be highlighted for correction in your CSV or XML file, or the source which generated the files. Duplicate entries and Client IDs are also detected and highlighted for your attention. From this screen, you may choose Close to stop the batch scan process until the file is corrected, or Scan Anyway to ignore the problematic entries and proceed with the scan.
Batch file validation
Please note that the batch file validation is limited to formatting checks only, and does not check for validity of contents.
Duplicate entries found within the batch file will not allow the system to proceed until they are removed or corrected.
If you are unable to proceed to scan the erroneous batch file, your organisation settings may be stopping you from doing so. Please check the Batch Setting as described in Administration > Manage Organisation
View results of batch scan
On completion of the batch scan you may opt to run another batch scan if you have multiple files or view results of the batch scan. Results of batch scans are available in Individual Scan > Batch Scan Results
Common Questions
Why can't I change the scan settings?
The Compliance Officer for your organisation may have preset the scan settings based on the organisation's risk and compliance obligations. For any changes to these settings, your Compliance Officer can review these settings at Administration > Organisations > {Organisation Name} > Settings.